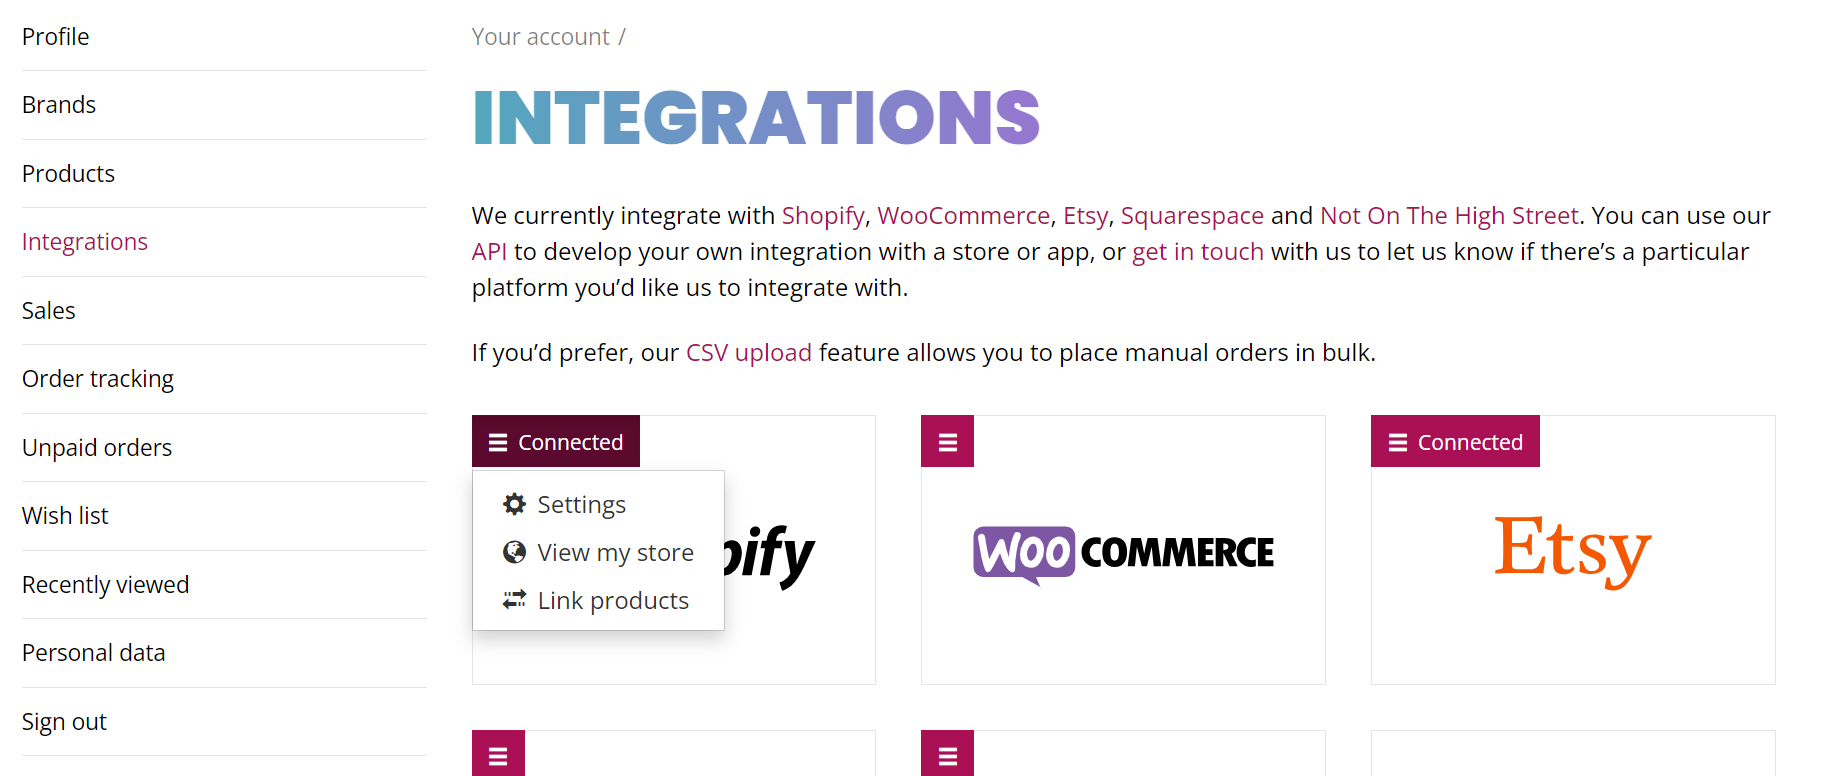
Shopify: Linking existing Shopify products to your Live Ink account
Linking existing Shopify products to your Live Ink account
This step-by-step guide explains how to link your existing Shopify products to your Live Ink account for automated fulfillment.
Pre-Setup Tip
If you plan to use custom inside neck labels, ensure you have set these up in your Brand Profile first. This allows you to select them during the linking process.
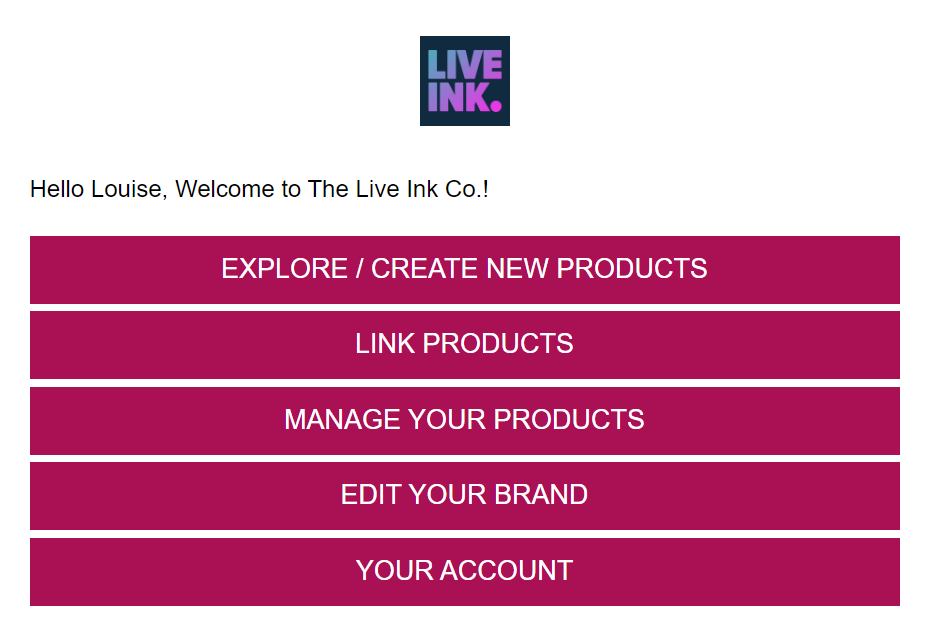
Step 1: Access the Live Ink App
-
Log in to your Shopify Admin.
-
Go to Apps in the left-hand menu.
-
Select the Live Ink app from your list.
-
Sign in to your Live Ink account when prompted.
-
Note: Your Shopify and Live Ink login details are separate for security.
-
Step 2: Enter the Linking Interface
-
On the Live Ink dashboard, click the "Link Products" button.
-
You will see a list of all products currently listed on your Shopify store.
-
Find the product you want to link and click the "Edit" button next to it.

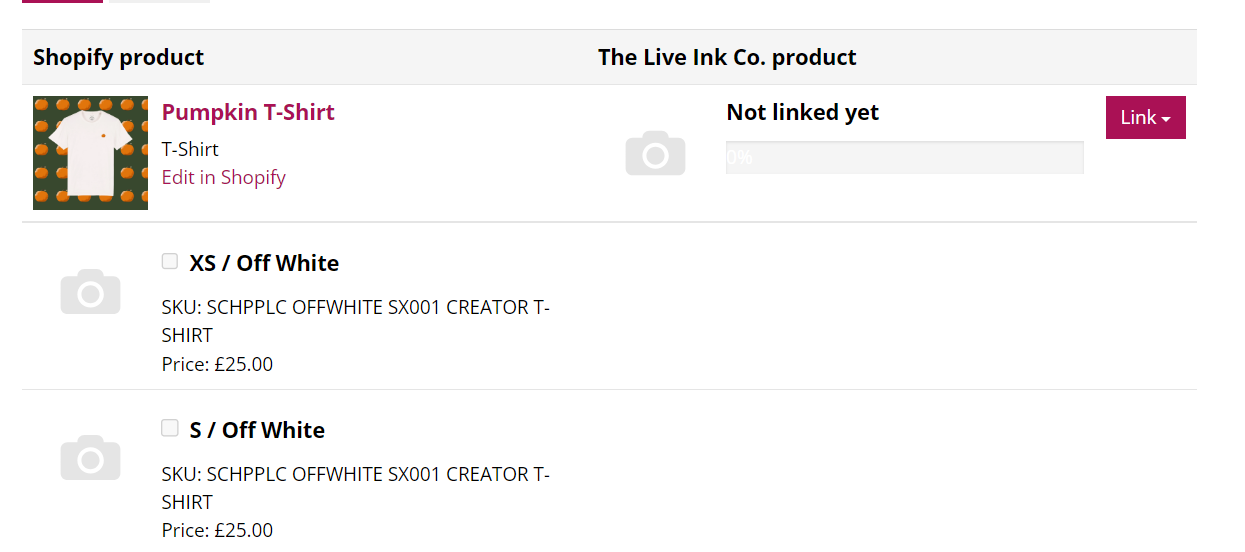
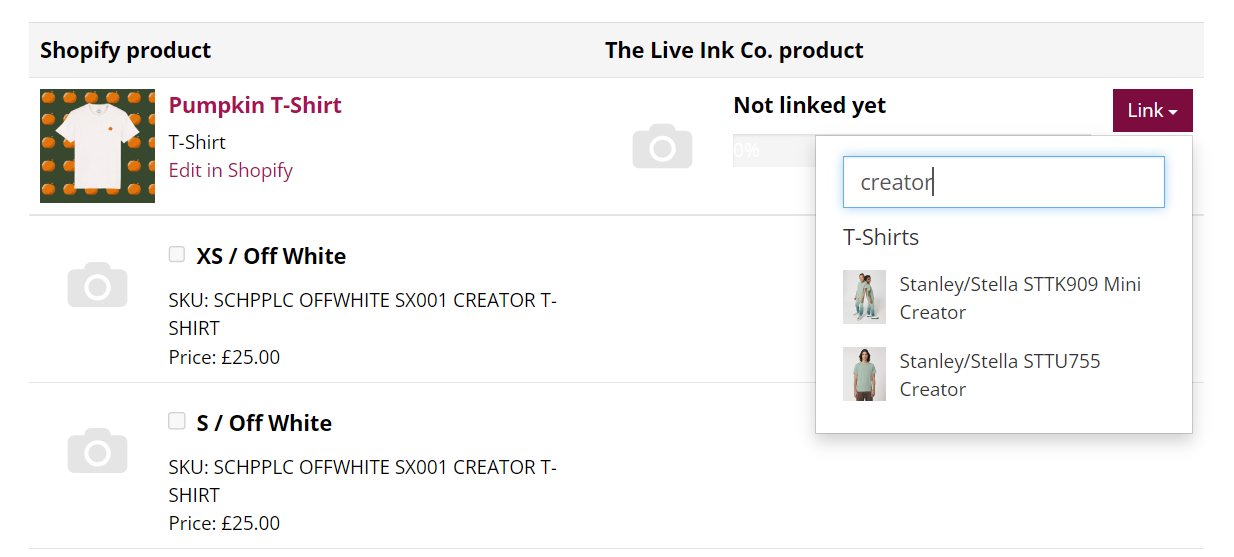
Step 3: Assign the Base Product
-
On the product page, click the "Link" button at the top.
-
Select the corresponding garment from the Live Ink product dropdown menu (e.g., "Stanley Stella Creator T-Shirt 2.0").
-
This establishes which blank item Live Ink will use to fulfill this specific Shopify listing.
Step 4: Map Your Variants (Size & Color)
Each Shopify variation must be manually "mapped" to a Live Ink variation.
-
Scroll down to the list of Variants.
-
Check the box next to the variant you want to link.
-
Correct the Auto-Populated Data: The app may try to guess the size/color, but you must use the dropdown menus in the "Live Ink Product" column to select the exact match.
-
Example: If your Shopify variant is "Large / Black," ensure the Live Ink dropdowns are set to "Large" and "Black."
-
-
Repeat this for every variant you want Live Ink to fulfill.

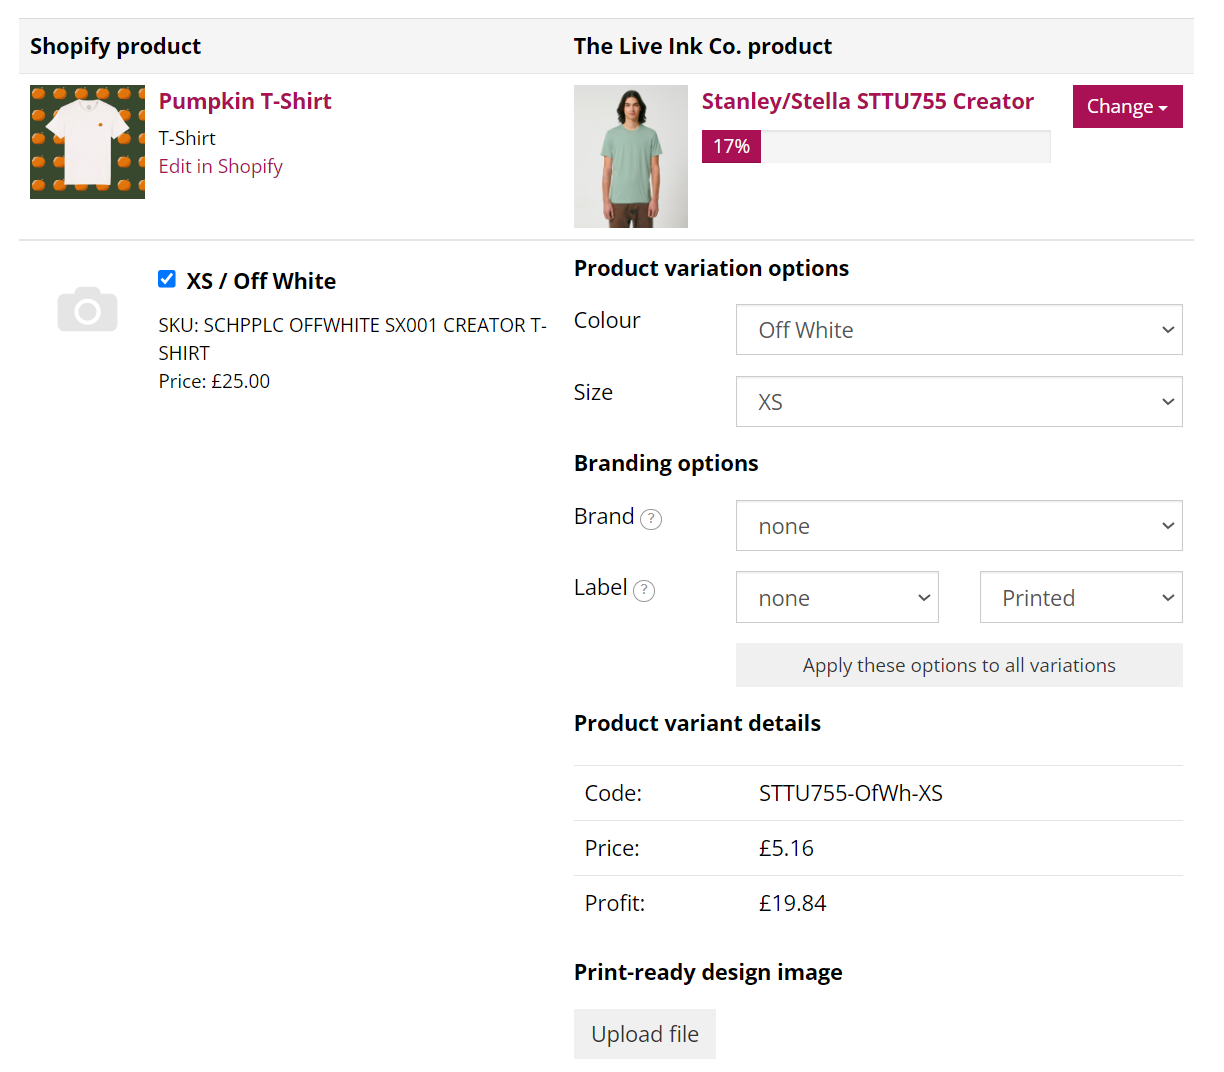
Step 5: Add Labels and Artwork (Optional per Variant)
Inside the variant row, you have additional options:
-
Brand/Label: If you have set up a brand profile, select your brand and the specific neck label you want printed.
-
Individual Print Files: If certain variants (like a white shirt vs. a black shirt) require different colored artwork, you can upload specific files here.
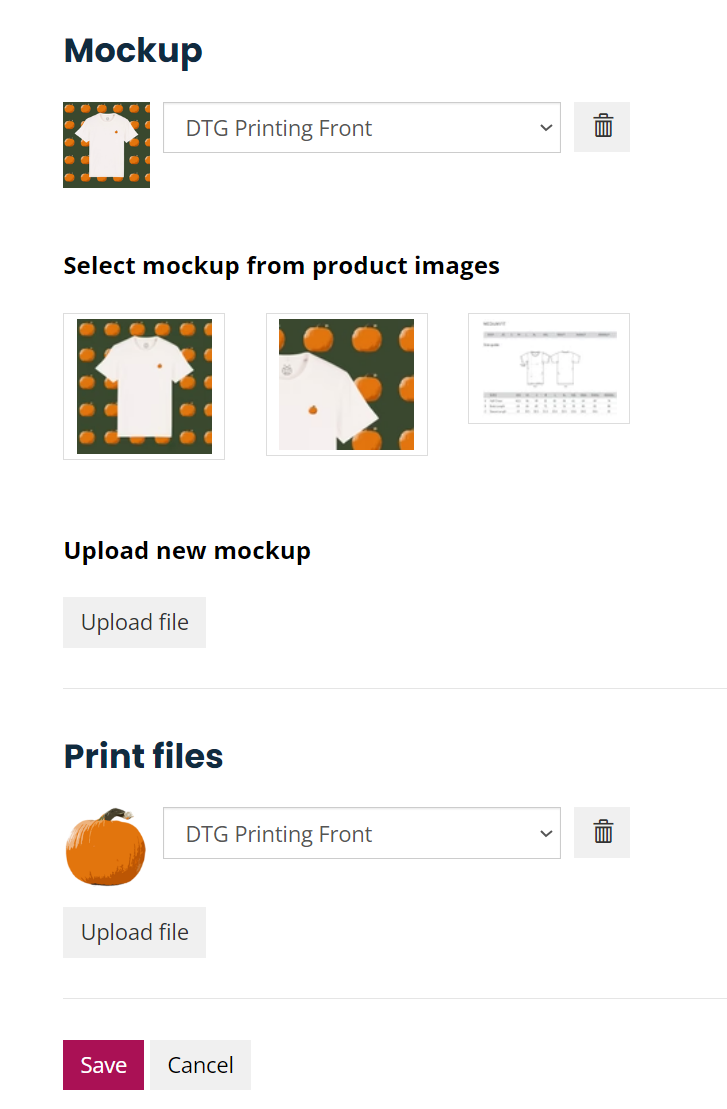
Step 6: Upload Final Assets for Quality Control
Scroll to the bottom of the page to provide the global assets for this product:
-
Product Mock: Upload a mockup image of the finished product. Live Ink uses this for quality control to ensure the print placement matches your vision.
-
Print File: Upload your high-resolution artwork (300dpi, in the Live Ink template).
-
Note: If you already assigned individual print files to every variant in Step 5, you do not need to upload a global one here.
-

Step 7: Save and Verify
-
Click "Save" at the bottom of the page.
-
You will be redirected to your list of linked products.
-
Check the Progress Bar: A green bar shows the percentage of variants linked. If it is not at 100%, click "Edit" again to link any remaining sizes or colors.
Important Reminders
-
Accuracy is Key: Errors in variant mapping (e.g., mapping a Small to a Large) will result in the wrong item being shipped to your customer.
-
Artwork Specs: All files should be 300dpi at the actual size you want them printed. Use the Live Ink designer tool beforehand if you are unsure about placement.